And here we are again with another battle report. Like I did last time with the Dwarfs I can show you my last army list in actual play. Before we begin the bashing I need to tell you something about our gaming group: when we arrange our games we usually tell us beforehand which race we want to play in order to avoid mirror matches. Each of us always has some armies ready so that we can have a backup if another player is going to use a race we wanted to play too. All is done in the most friendly of ways and we never build armies in order to counter a particular race/build so whatever matchup comes out can be fun to play and, even though sometimes one may face an army that’s a hard counter to his own, we don’t care much as we are not really much a competitive group. This time Federico refused to reveal his race, only saying he wanted to try a surprise build, and that he was certainly going to lose the game. I just wanted to try my melee oriented High Elves so I asked him if I could play them, and he agreed. Then, when we met, he came out with… well, you’ll see it in a moment.
The Armies
Orcs Goblins (played by Federico)
Azhag the Slaughterer (33)
Wolf Riders (8)
Night Goblins (4) x3
Goblin Doom Divers (4) x3
32/33 Points
Grom the Paunch (35)
Doom Diver Catapult (5) x2
Night Goblins (4) x3
Goblin Doom Divers (4) x3
34/35 Points
Initiative Modifier: +2
Command Cards:
Inspire (3) – Bold
Assault (4) – Bold
Strength of Gork (3) – Steady
Lure (3) – Devious 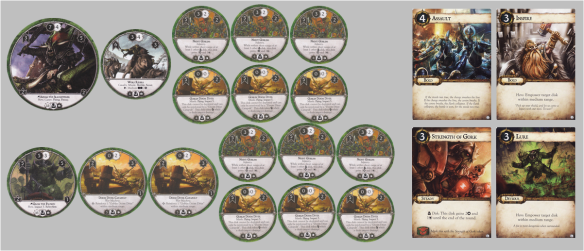 High Elves (played by me)
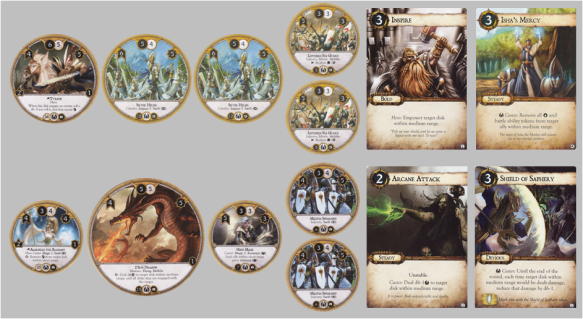
Tyrion (34)
Silver Helms (12) x2
Lothern Sea Guard (5) x2
34/34 points
Alarielle the Radiant (35)
Sun Dragon (15)
High Mage (7)
Militia Spearmen (6) x2
34/35 points
Initiative Modifier: +1
Command Cards:
Arcane Attack (2) – Steady
Inspire (3) – Bold
Isha’s Mercy (3) – Steady
Shield of Saphery (3) – Devious
After the surprise of seeing the Goblin Army in front of me, we rolled Initiative. Federico got the First Player token and I, as the second player, decided that with all those Impact 5 in front of me Rain of Arrows was definitely a better scenario then Generalcide. The game started uphill for my opponent as he drew the “5 VP per disk overlapping an enemy deployment zone” objective, which was going to prove quite difficult to accomplish. I was luckier, and came up with the standard “1 VP per enemy casualty” one.
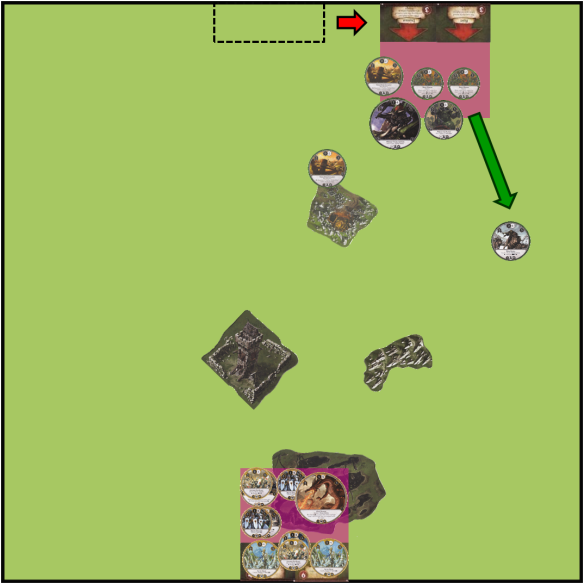
As we drafted our Deployment zones I went for All In and Advance, which allowed me to field my whole army without worrying for reserves. Federico instead drew a Feint and a Disperse, which is nice when you have large, bulky disks like Azhag that is going to clog the deployment zone up.
My first terrain pick was almost automatic as I went for the Watchtower. Federico then decided to place an annoying Swamp in my deployment zone, preventing my units from advancing too fast and basically negating one of my strong advantages. I then decided to fully counter the enemy Doom Divers and got myself a patch of rocks that I placed near the Watchtower, towards the right. Last Federico added yet another fortified terrain as he placed the Mine Entrance near his deployment zone, putting a Doom Diver Catapult on a corner of the terrain.
With a combined deployment value of 10 I could deploy my whole army ignoring the limitations imposed by All-In. Thanks to the swamp my opponent kindly placed in my deployment zone my cavalry was forced back on the battlefield edge. Fortunately Federico was not that mean and left a corridor on the left where I could place Tyrion and some disks, while I deployed the Sun Dragon on the swamp itself as it could just fly over it.
Federico used Feint to move the deployment zone to his left, placing the two heroes and the Wolf Riders (who then scouted ahead) in the front line, and two of the six Night Goblin mobs plus the second Doom Diver Catapult behind them.
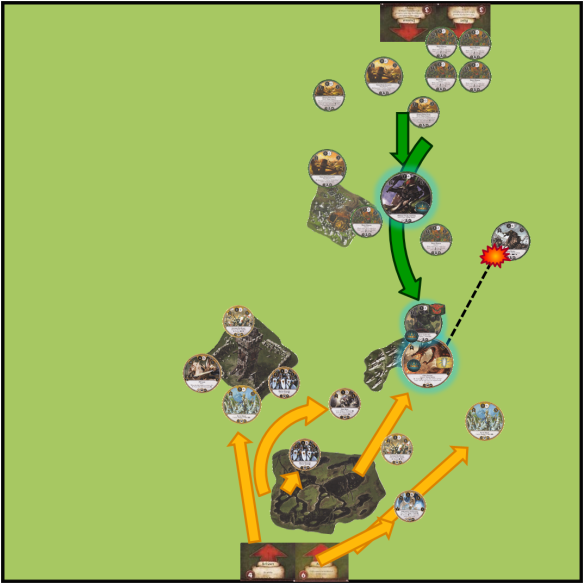
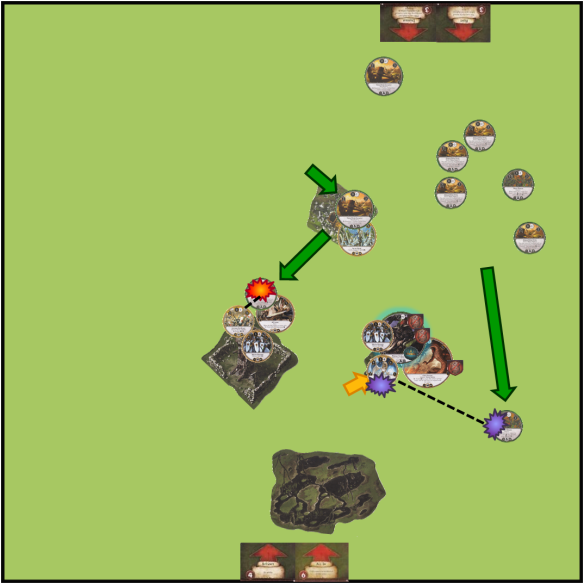
Round 1, Activation Phase: Spirited Charge
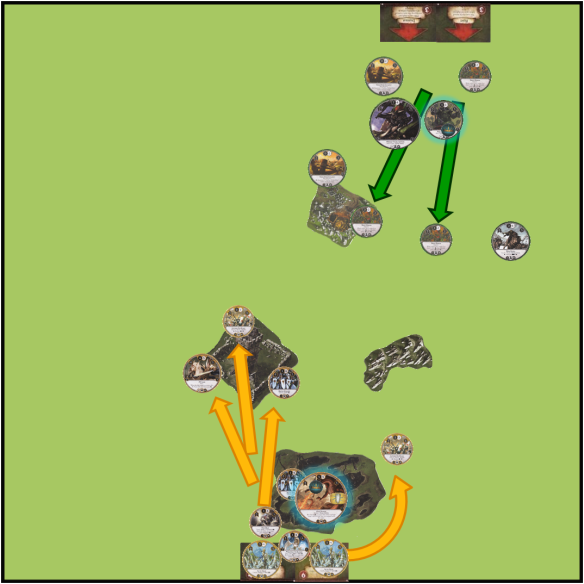
The two units of Night Goblins marched forward while another one emerged from the reserves and Grom the Paunch empowered himself. As Alarielle cast empowering and shielding spells on the Sun Dragon, Ulthuan infantry began their slow walk out of the swamp. Tyrion, guarded by Lothern Sea Guards and Militia Spearmen took control of the Watchtower, while the second Lothern Sea Guard moved around the swamp to the right.
As more and more Goblins arrived from the reserves and both Doom Diver Catapults launched crazy winged lunatics into the air, the Sun Dragon made the first victim of the game incinerating the Wolf Riders from the rocks. My Silver Helms spread out, one towards the Watchtower, the other to the right of the swamp. Alarielle and the High Mage cleared the swamp too, while the last unit of Militia Spearmen was stuck in the mud and barely reached the border of the marches.
Finally Azhag advanced carefully between the goblins, while Grom’s chariot launched itself in a spirited charge towards the Sun Dragon, the Big Goblin so filled by the might of Gork (or was it Mork?) that he overlooked the fact that the Dragon was empowered too.
Round 1, Melee Phase – High Magic vs Waaagh!
The only fight that had to be resolved was the one between the Sun Dragon and Grom the Paunch. Though he received a bad wound from the monster, the Goblin Hero tried to break through Alarielle’s magic with a devastating 8-Strength attack. Too bad for him, the Shield of Saphery was too strong and absorbed most of the damage, leaving the Dragon lightly hurt.
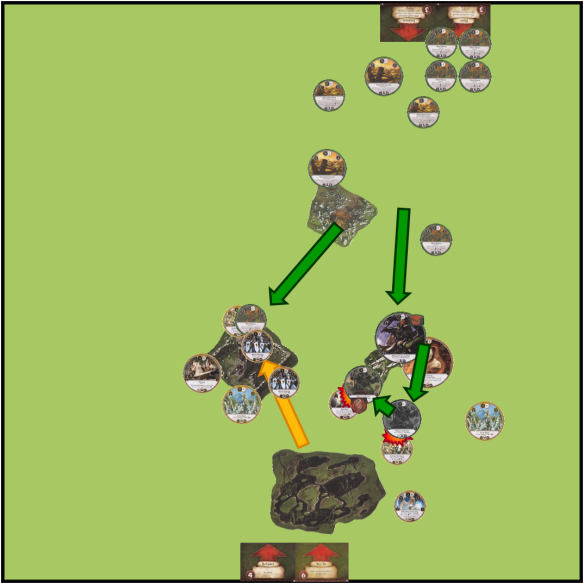
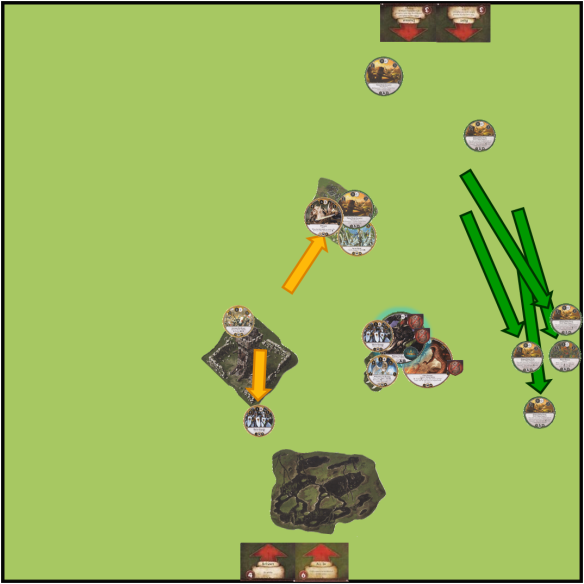
Round 2, Activation Phase: Stop that Chariot!
Though wounded, Grom was in an advantageous position, and trampled over the Lothern Sea Guard, turning then around and killing the High Mage too. To prevent the Sun Dragon from moving, Azhag invoked the Strength of Gork and joined the fight while the Night Goblin on his right charged the Lothern Sea Guard on the Watchtower and were met by a countercharge from the Militia Spearmen that were just able to exit the swamp.
As more goblin advanced, the High Elves answered with a resolute but careful counterattack. The leftmost Silver Helms could whack two Goblin units in the fields but would then have been in an unsafe spot where Doom Divers could hit them, so they intercepted one Night Goblin unit by the Mine Entrance. A unit of Militia Spearmen charged Azhag while Tyrion attempt to free the Lothern Sea Guard by instantly destroying the Night Goblin was unsuccessful. Alarielle showed another great feat of magical power as she launched an irresistible Arcane Attack that incinerated Grom the Paunch on the spot.
As the Doom Diver Catapults continued to launch their deadly living ammunition in the sky, a unit of Night Goblins, empowered by Azhag, charged the Silver Helms and was followed by one of the Doom Divers in an attempt to lock my cavalry for the next round too.
Alarielle was still unactivated, so she ran towards the rocks, where she came within medium range of the Silver Helms and was able to cast Shield of Saphery on them. My second Silver Helms unit, empowered, closed in on Azhag, who empowered himself as well and called in a unit of Night Goblins for support.
Round 2, Melee Phase: Gaining the Upper Hand
Two of the three scrums were pretty one-sided for the High Elves: on the Watchtower, Tyrion and the Militia Spearmen took down the Night Goblins with ease, while near the Mine Entrance the Shield of Saphery kept the Silver Helms alive against the Night Goblins that were pinning them. Having dealt with their attackers, the SIlver Helms turned their attention to the other Night Goblins and killed them swiftly.
The big scrum over the rocks costed the lives of the other Silver Helms, who took damage from the Night Goblins and then were finished by Azhag, but not before they were able to deal a wound to the Warboss. As Sun Dragon also took a wound from Azhag’s furious attack, it was able to inflict another hit on the Orc hero thanks to the damage caused by the Militia Spearmen.
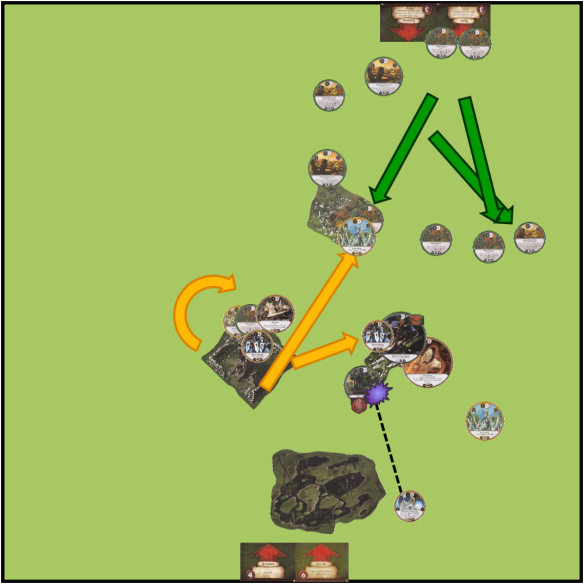
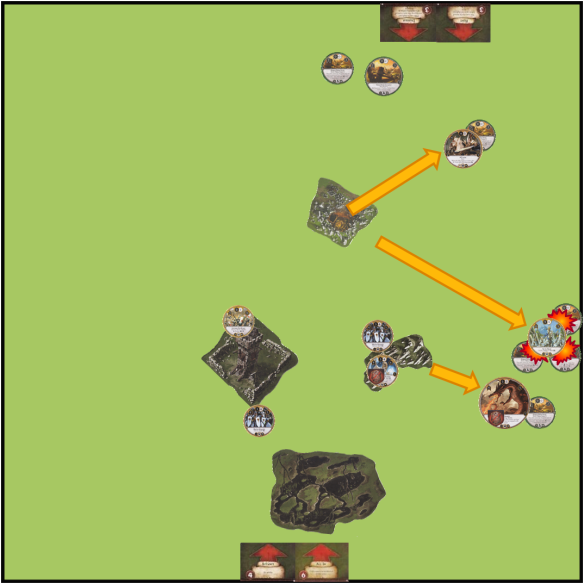
Round 3, Activation Phase: Oh, Gosh Batman! Tyron!
Federico was able to secure initiative for the first Command Card of round 3 and performed another chain pinning moving the Doom Diver that was on the Silver Helms to engage Tyrion (who didn’t manage to activate his ability). As one of the remaining units of Night Goblins rushed forward, Alarielle intercepted it with an Arcane Attack while she charged Azhag in order to take him out for good. Unable to completely control the spell, however, the Everqueen took some backfire damage but fortunately not enough to cause a wound. In the meantime the Lothern Sea Guard on the Watchtower opened fire at the Doom Diver with the extra die from Rain of Arrow, shooting the annoying goblin down.
As the remaining Catapult shot another Doom Diver – the fifth – in the air, the rest of the Divers and the only surviving Night Goblin unit ran to the sideline. That smelled too much of “invade enemy deployment zone” objective to me. I still had time to prevent it, but with my big units pinned I needed to act now. Now free to move, Tyrion charged the Doom Diver Catapult that was keeping the Silver Helms blocked, while the Militia Spearmen on the Watchtower marched back to guard my deployment zone.
Round 3, Melee Phase: Elves Like to Fight Fair… Or Do They?
Having numbers on my side, my Elves were able to easily win their respective fights: Tyrion and the Silver Helms destroyed the Doom Diver Catapult, while Alarielle and the Spearmen dealt the final wound to Azhag, saving the Sun Dragon at the price of a wound of the Everqueen.
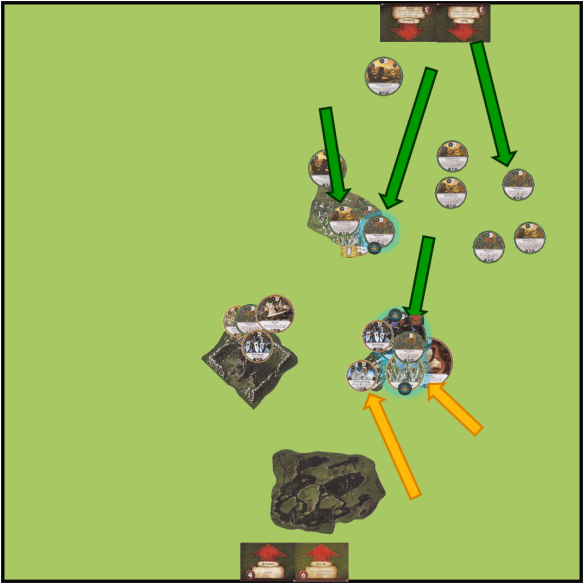
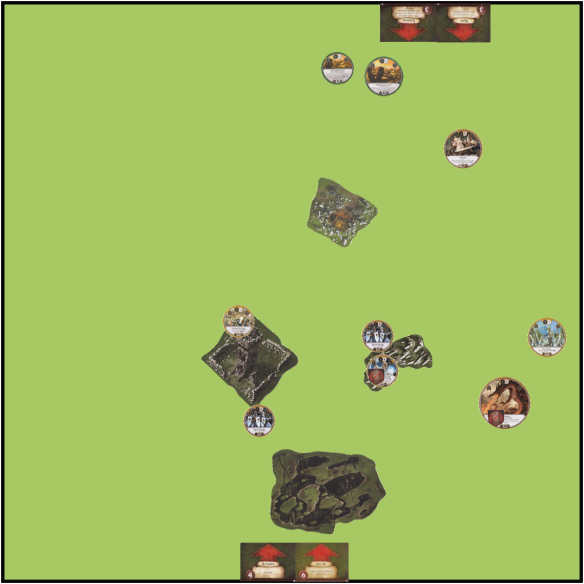
Round 4, Activation Phase: Faster Than One Can Say Silver Helms
This time I was able to act first, and went for a quick finish: Tyrion charged one of the Doom Divers, the Sun Dragon charged another and the Silver Helms managed to reach the remaining two Divers and the last Night Goblins, taking then out immediately. My opponent’s only move was to reinforce the sixth and final Goblin Doom Diver. And that was all.
Round 4, Melee Phase: White Flag
Given that Tyrion and the Sun Dragon destroyed their respective targets, and Federico was left with just a Doom Diver Catapult and a Goblin Doom Diver, surrender was inevitable. Victory for the High Elves!
Conclusions
Though the premise was that of a potentially one-sided match, and it certainly was, I felt it could have gone differently had I not been able to use the last player’s advantages in order to take a couple of Fortified terrain. Federico’s fear of the Silver Helms did the rest as he gave me the third one that was well within reach of the other two, allowing my troops to always stay on safe ground… well, not really always as the only time I left units in the open I lost both the High Mage and a unit of Lothern Sea Guards. Anyway i was able to completely neutralize the Doom Divers, and that gave me a huge advantage as more than half of the enemy army (points-wise) was rendered useless.
Were it not for the terrain, though, I would have risked to lose a lot of units to the Divers, though probably two Catapults and six Divers are a bit too much. Since the Doom Divers are destroyed after dealing damage, a quick way to evaluate their effectiveness is by counting the point value of the enemies they take down with them: once they are gone, you want to be left with more valuable disks in play than the enemy. As two Catapults and six Divers cost a combined 34 points, they must basically destroy an entire regiment to get even. Add to this the fact that you need at least three rounds to have all the Divers in place, and the last you reinforce can only activate from round 4 onwards and you’ll see it’s not an easy task to return their cost. Personally, when I play it, I use 1 catapult and 2 divers as I feel they are less risky to use, but forgive me if I’ll reserve to talk more in detail about them in a future post.
Overall the Goblin Swarm army was funny to play against but I felt it lacked the punch that more expensive units can bring to the table. I am more and more convinced that the primary role of cheap units is to fill up the ranks of a regiment and yes, give you numbers advantage and mess with the enemy battle plans keeping much stronger foes (even just for a round) in order for the rest of you army to capitalize on the mismatch. This said, Night Goblins are much stronger than their cost might suggest, and packing a few of them in an Orc army is never a bad idea.
And that’s it for today! As always, thanks for reading. See you next time!

I’ve been wanting to try a Goblin based army myself. But, like you say in your battle report, the divers are just too expensive and situational to bring so many. I think I’d add a catapult to this list somewhere, and some more night goblins. I know the catapult shows an Orc on the art, but the machine is run by goblins, so I think it still makes for a fluffy unit in a goblin themed army.